Need some help with accessiBe?
Find your answers here!
How to install accessWidget on a Volusion website
Install accessWidget on your Volusion website using custom code to help make your website accessible to everyone.
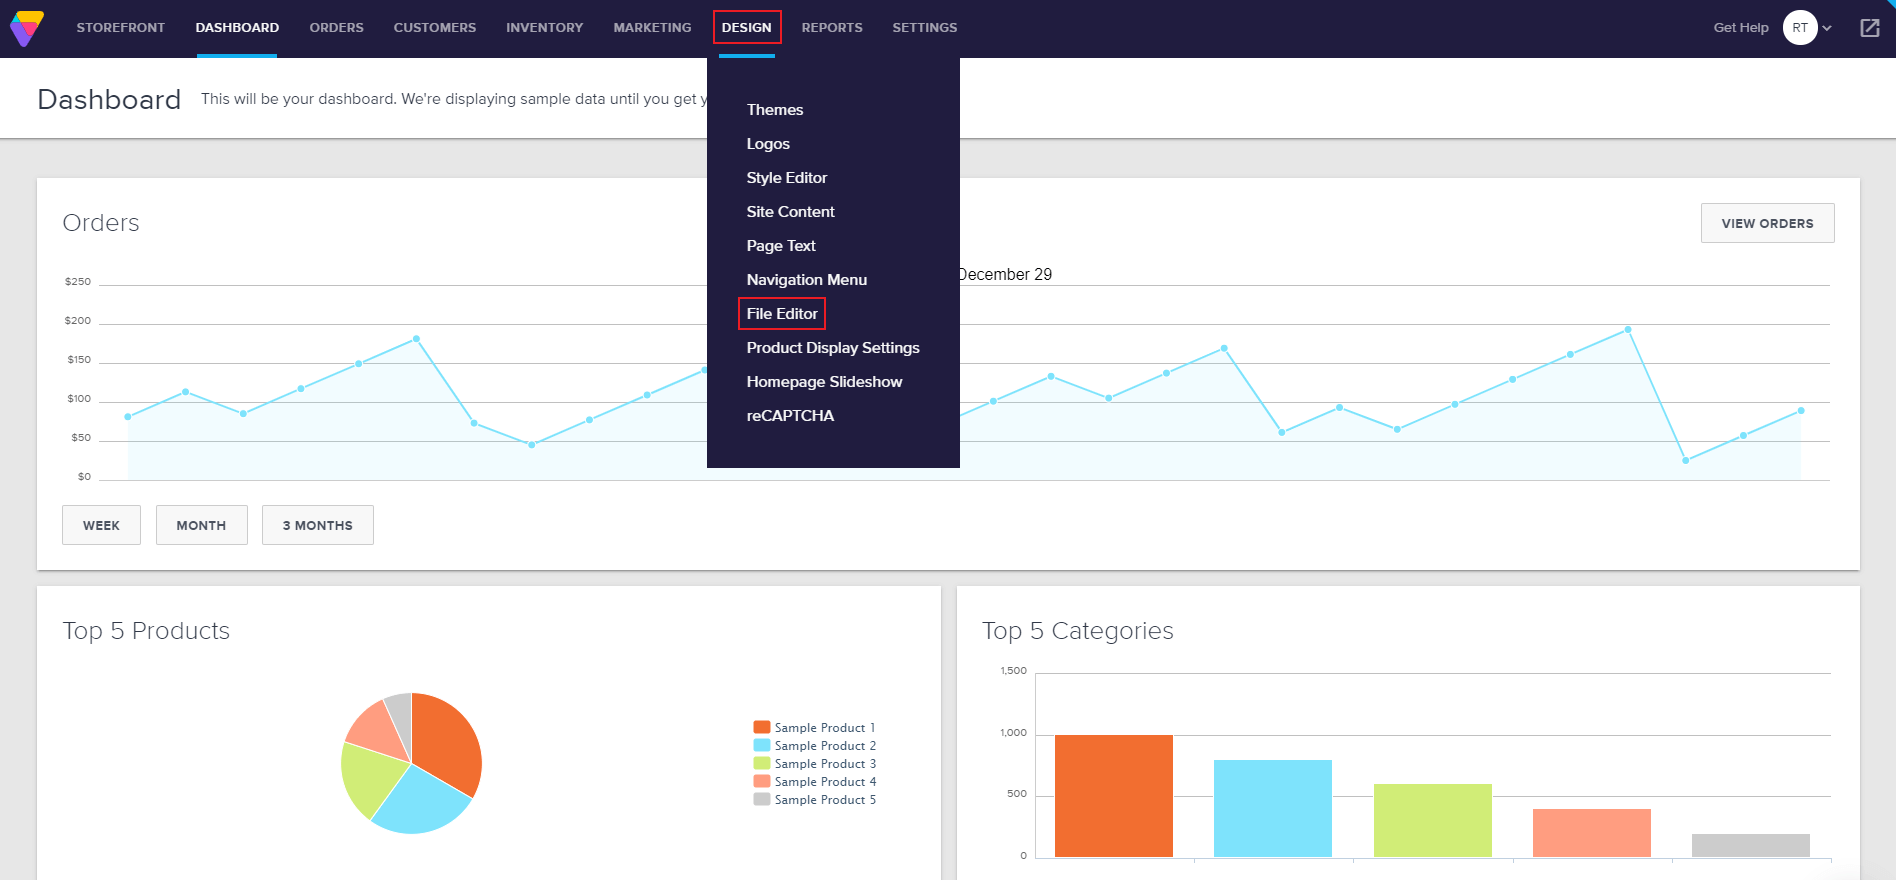
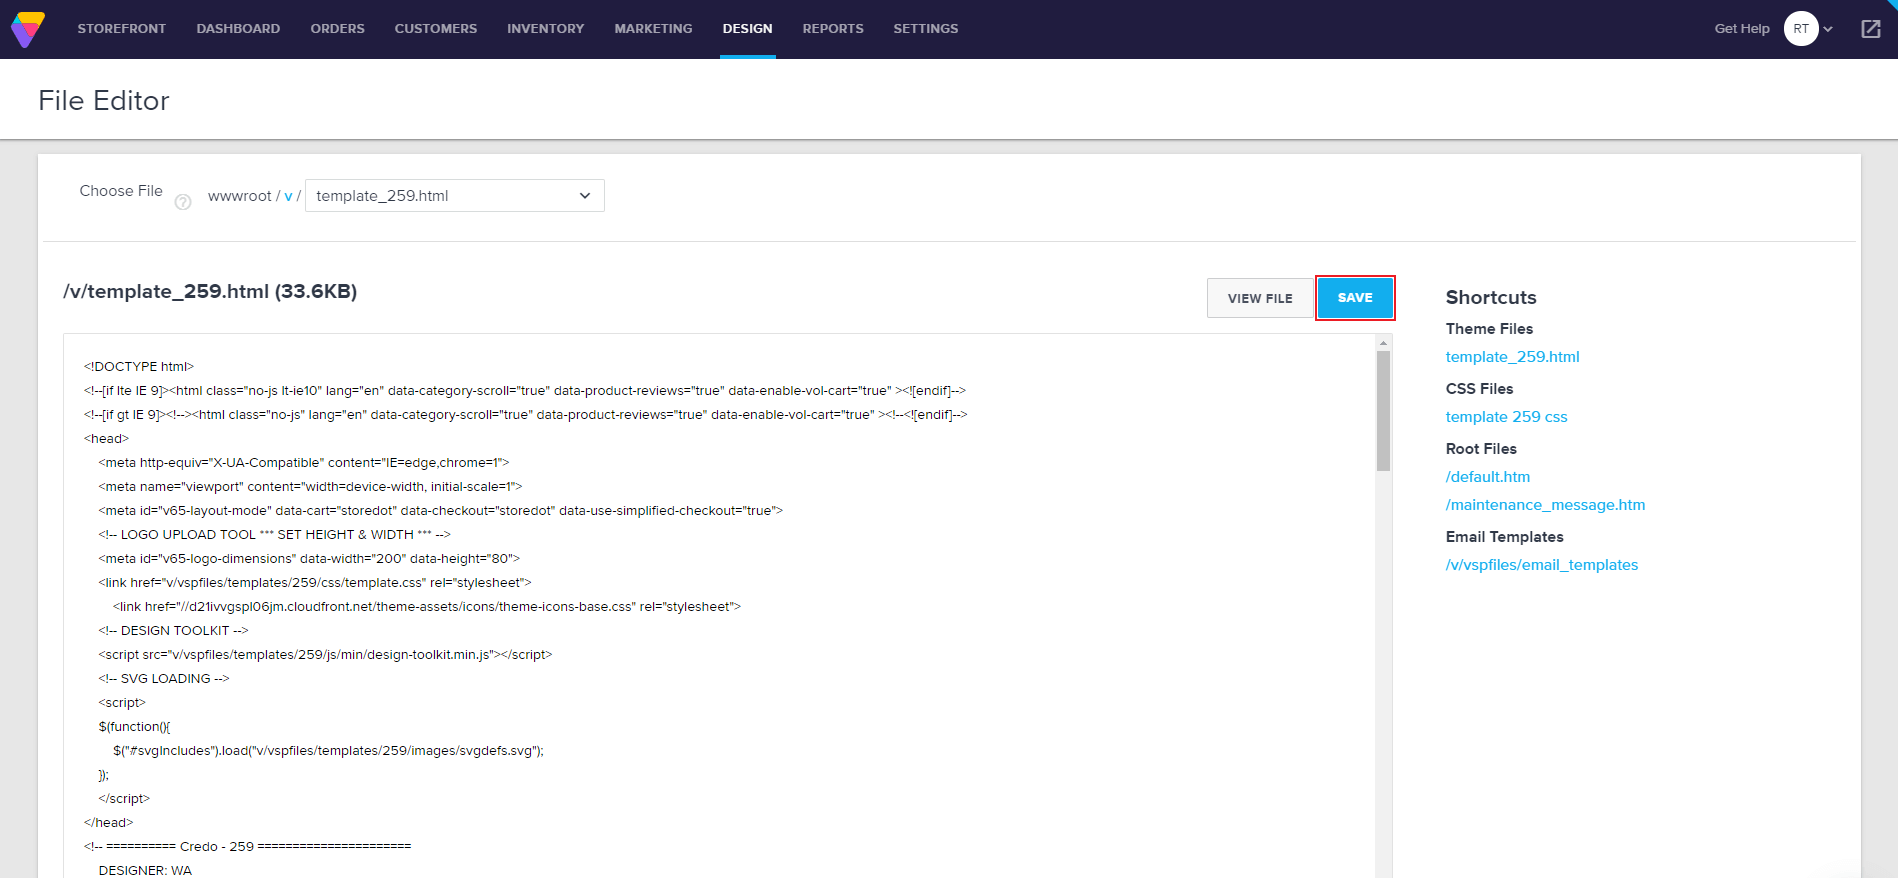
- In the dashboard, go to Design and select File Editor.
- Under Shortcuts > Theme Files on the right is your active template's HTML file starting with "template_" and ending with .html. Click it, and you'll be prompted with a text editor to modify the HTML code of your template (don't worry, this is not scary as it may initially look).
Note: If you sometimes switch templates, there's a select box in the top left of the page where you can look for other templates that are installed on your website, and install accessWidget on those as well.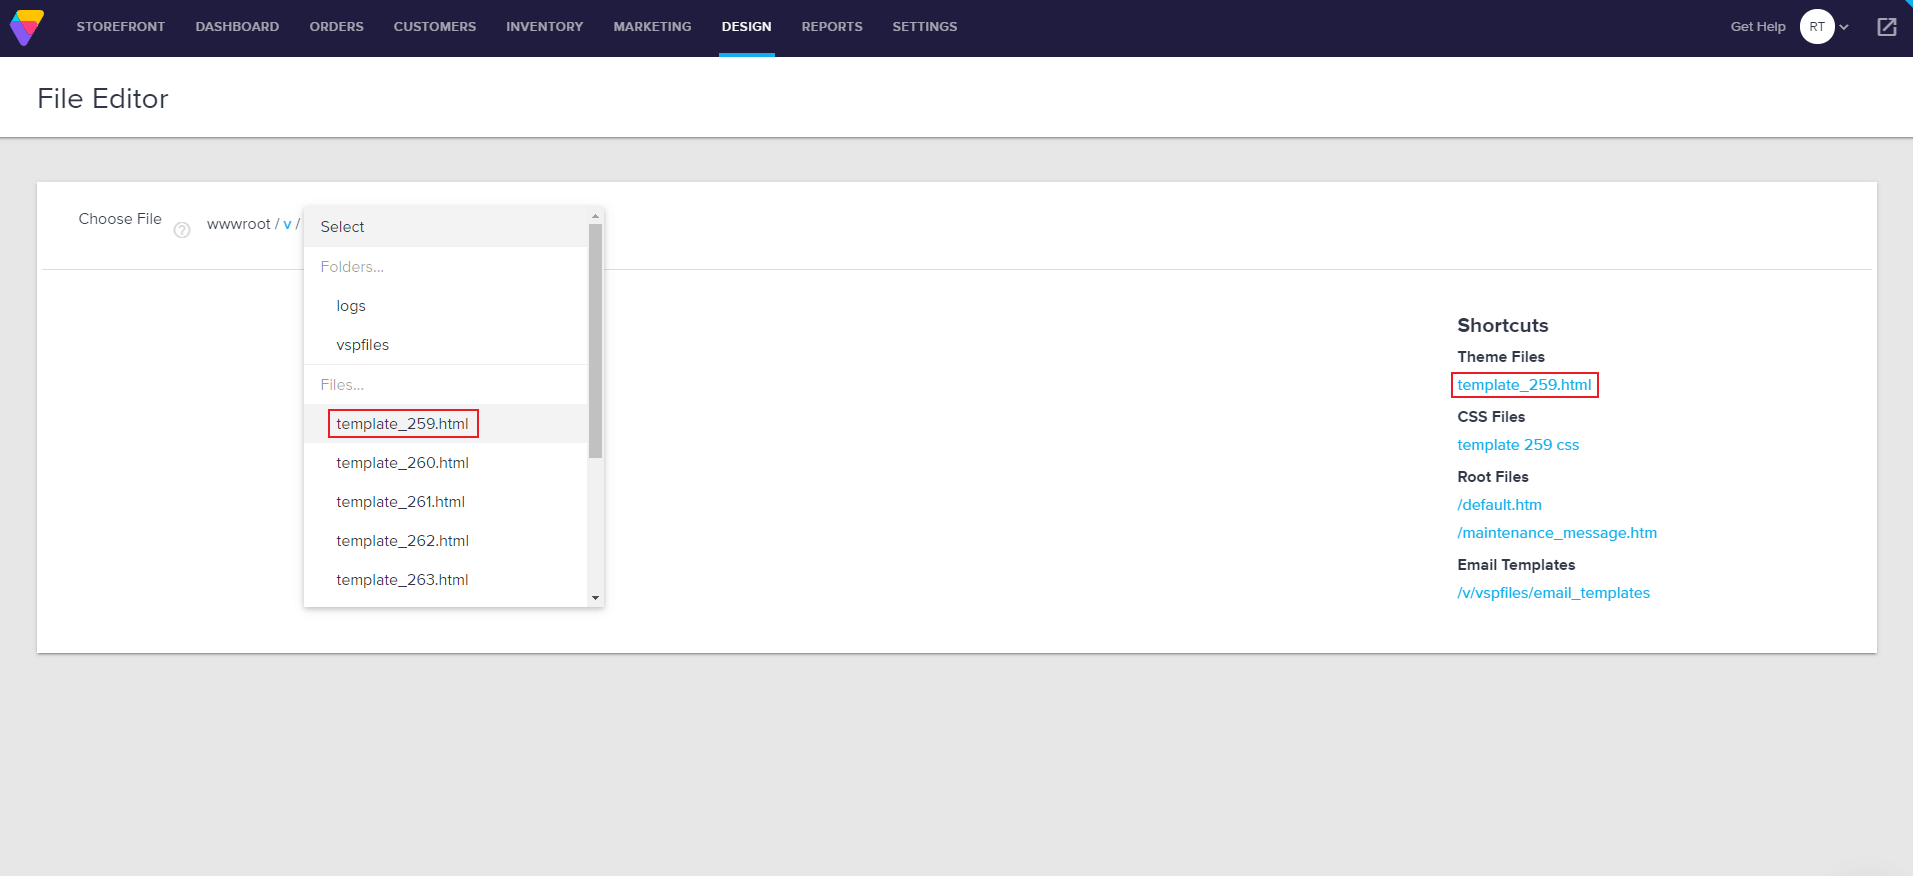
- accessWidget will work wherever you place the code in your template, however, we suggest putting it right before the closing of the body tag, which is always the second line from the end of the file.
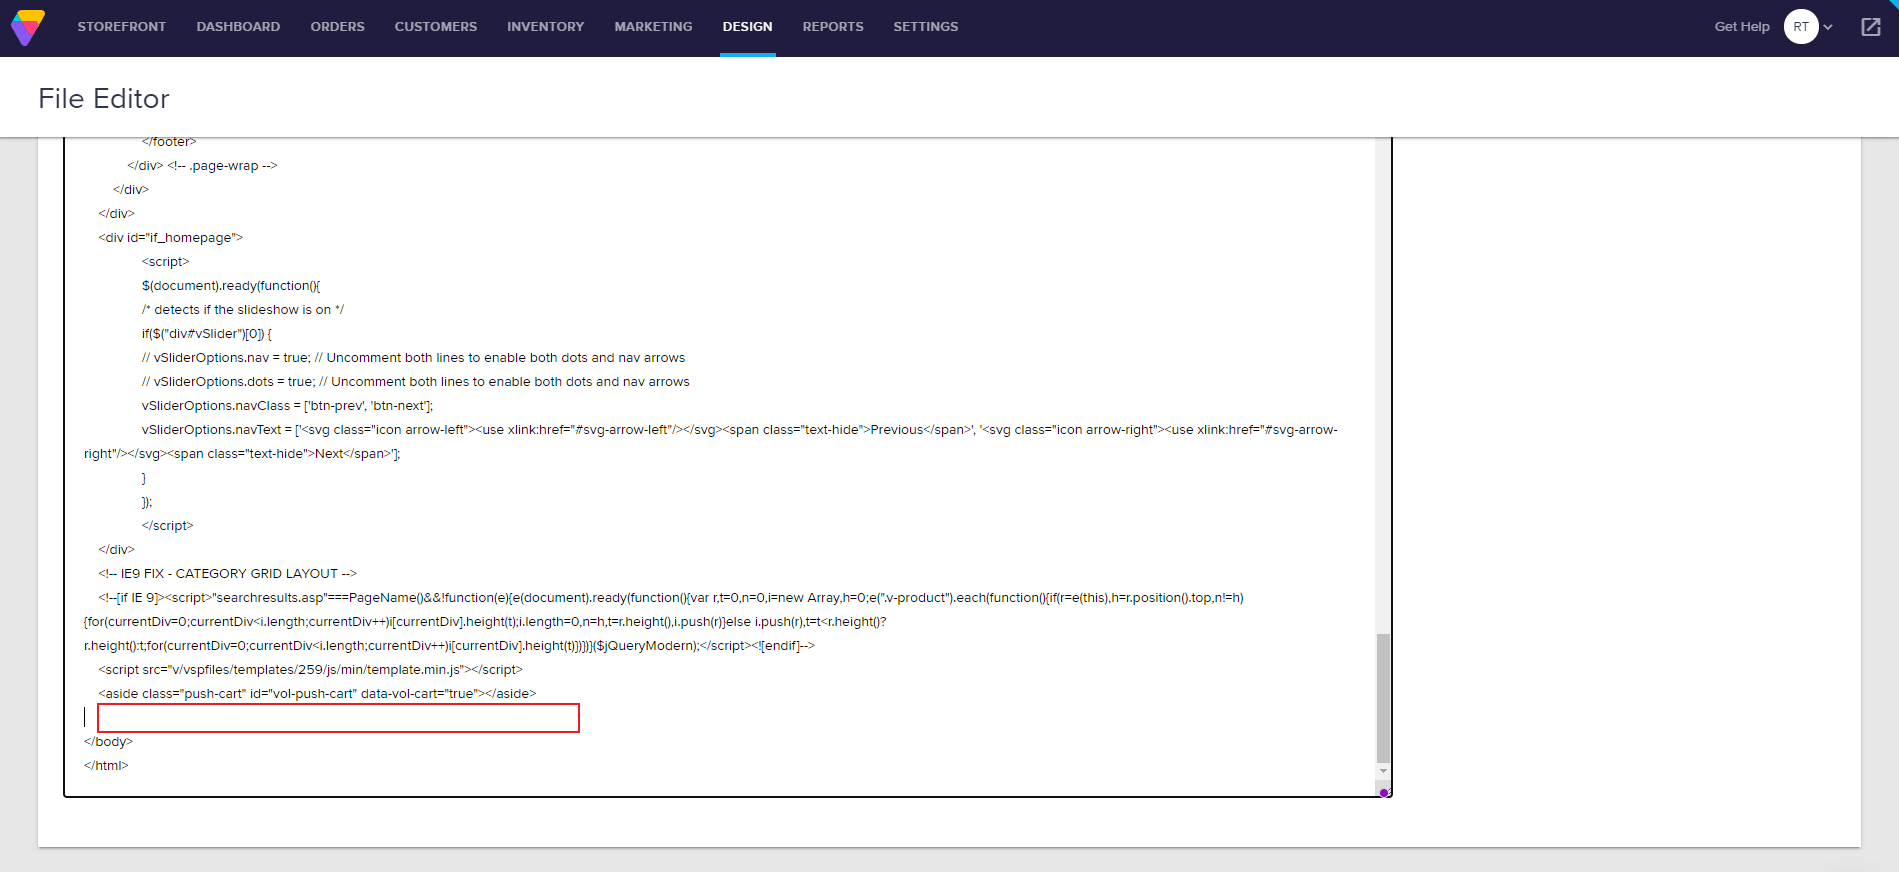
- In the defined area, paste the installation code that you received from us when you registered your site for our service in the text box. If you don't have the installation code:
- On the accessiBe homepage, select Login in the top right corner, and log in to your account.
- Select My Licenses and select the specific license where you want to install accessWidget.
- Select Install and customize widget.
- Under Quick installation, select Copy to Clipboard to copy the installation code.
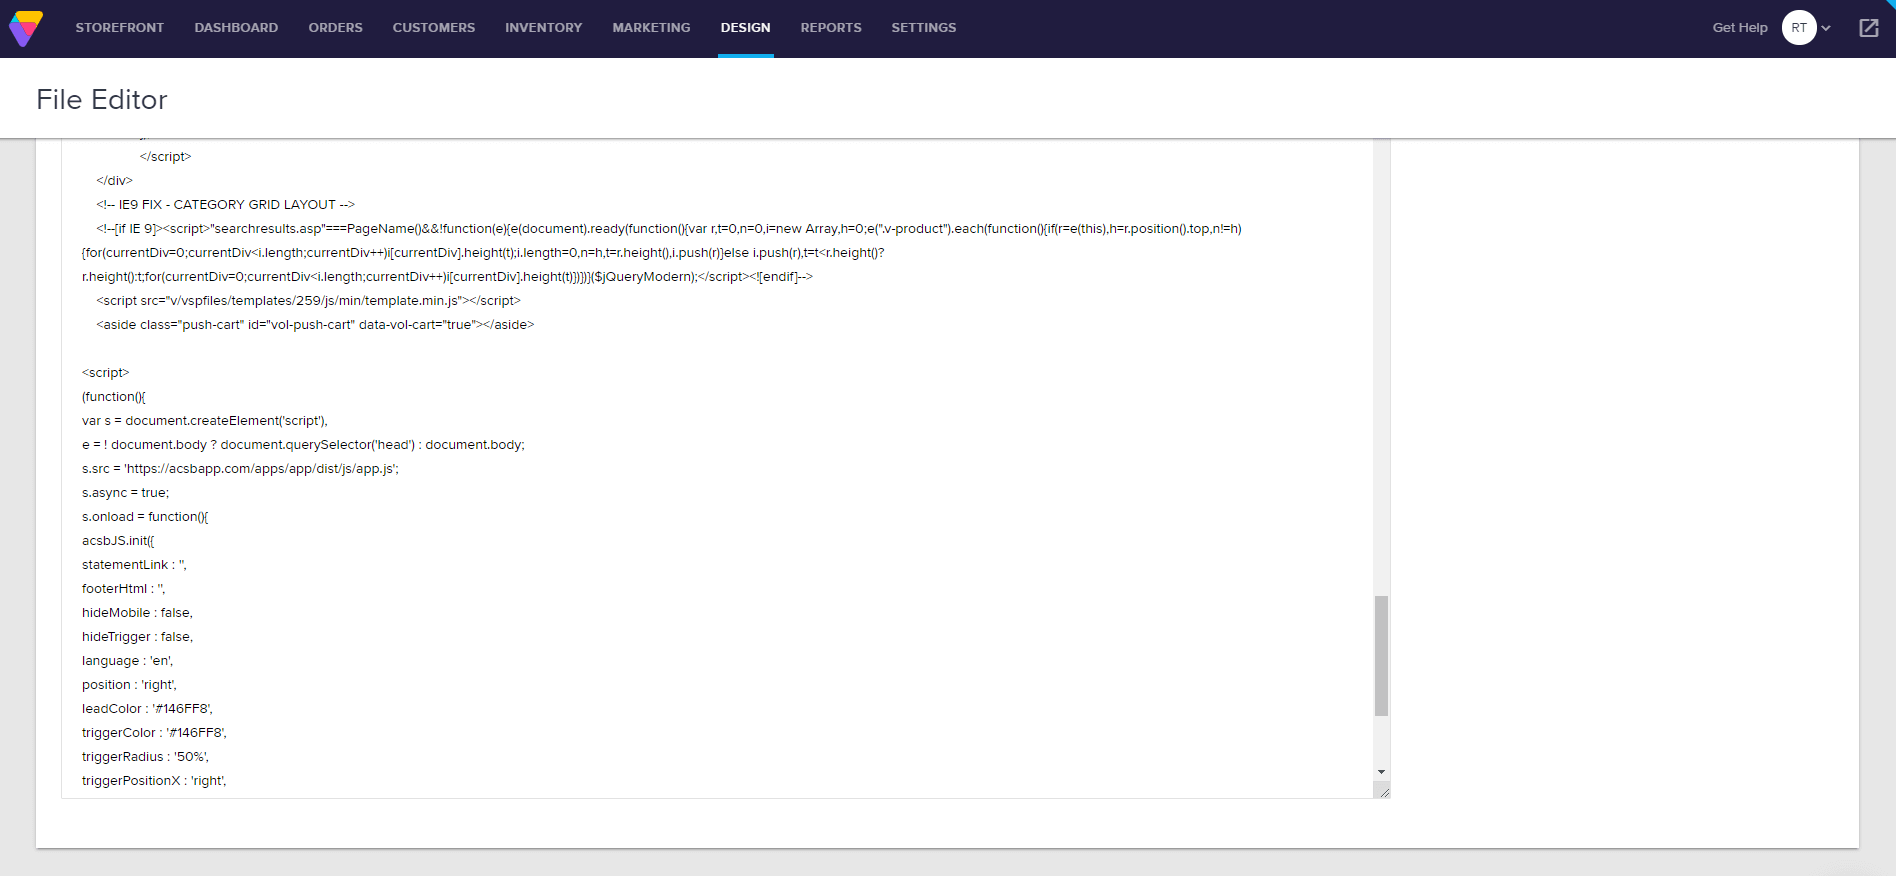
- Select Save and refresh your website for changes to take effect.
- Customize your installation to match your website and brand.
Good work! You've installed accessWidget, making your site accessible.
For more information see our Website Onboarding Guide and follow the instructions to ensure proper installation and performance.
